How To Create A Hanging Calendar Using A Lace Up Journal

Crop Class NSD 2010
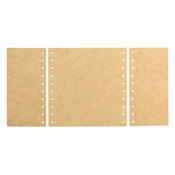
Today we'll be creating this hanging calendar from the KaiserCraft Lace Up Journal and products from the Pink Paislee Bayberry Cottage line. The great thing about this calendar is that we will leave the photo and calendar areas open so we can change out the picture and month!

Aside from the products listed below you will need:
– good, strong adhesive (I used dry)
– a Cropadile or good hole punch
– coordinating ribbon for lacing and hanging
– black ink (optional)
– foam tape or pop dots (optional)
First, you'll need to download and print the calendar pages. You can get the ones I used here. Print them on white cardstock and trim just outside of the black border so there is a thin frame of white around them. Don't worry about them being exactly the same because they will all fit regardless. You clearly will not need the months of the year that have already passed. When we get to 2011 go to the website at the top of that page and there may be a new calendar. Otherwise, just Google "2011 printable mini calendar" and you should get plenty of hits to print out the next year's worth of month cards.
Covering the Panels
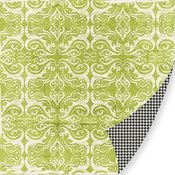
KaiserCraft makes it easy to cover these pieces of MDF because they are even dimensions. Yay! Cut a 4 x 8 inch piece of the teal paper and a 4 x 8 inch piece of the black houndstooth paper. Cut an 8 x 8 piece of the green print paper. Cover each of the panels using your favorite adhesive. I simply used my ATG but you can choose any adhesive runner or even wet adhesive such as Mod Podge. Trim the corners ever so slightly to match the boards and ink the edges with black ink (optional). Use a hole punch (the Cropadile is great here!) to re-punch all the holes.

Get your teal piece in front of you. This will be the top of the calendar. Cut a 1.5 x 8 inch strip of the black swirl paper, ink the edges, and adhere it to the top of the panel. Don’t forget to keep the holes towards the bottom!

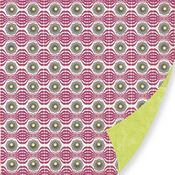
Get the large green piece in front of you. This is the middle section of the calendar. Cut a 3 x 8 inch piece of the teal houndstooth paper and a 3 x 8 inch piece of the “solid” black paper. Ink and adhere as shown:

Get your black houndstooth piece in front of you. This is the bottom section of the calendar. Cut a 3 x 4 inch piece of the cranberry swirl paper. Ink and adhere as shown:

Details
Next, we are going to make a few of the “accessories” that we will need. Part of the charm of this project is that we are making it so the photo and calendar parts can be swapped out. That means we need a way to keep those elements “stuck” to the calendar without making it permanent.
First we’re going to cut two mats for the photo and calendar areas. Use your coordinating cardstock and cut a 6 ¼ x 4 ¼ inch piece for the photo mat. The calendar mat is an odd measurement so just take one of your pre-cut calendar cards and cut the mat to have a small border around the month card. Ink the edges of both pieces.
Cut a ½ inch strip of the teal/black swirl paper and then cut four 1 inch pieces off of that. These little bits should be folded as shown to make four photo corners:

Slip the corners on the larger photo mat and adhere JUST the backs of the photo corners. You want the front triangles to be open so you can later slip the actual photos in there.

You need to do this again using a slightly smaller strip of the teal dot paper… about ¼ inch. Cut your pieces longer than 1 inch because they are so small to work with. I just taped these on the back of the smaller photo mat, again leaving the front of the triangles open so we can slip the calendar pages in there.

Now take your crystal flourish and cut it as I indicate below. This will allow us to “stretch” one piece of bling into three!

Completing the Top
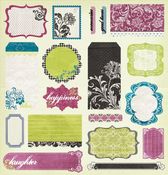
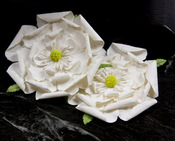
Pop out the two die-cut pieces, ink them, and layer them on the panel. Add one of the white flowers and the right-most cut of the bling flourish as shown. Finally, place the word “family” or any other sentiment on top of the die-cuts.

Completing the Middle
Adhere the photo mat. Add the die-cut tag to the left of the mat and pop the “memories” piece with foam tape or pop dots. Add the long black die-cut, a strip of artisan tape and white flower as show. Layer the large, top cut of the bling flourish as indicated.
To create the flower: Use the artisan tape to make the ruffled bottom layer like this:

Punch or cut two 1 inch circles. Trim one of them so it is smaller. Ink the edges and crumple in your hand for texture. Layer the ruffled circle with the two paper circles, punch a hole in the middle, and add a brad.

Completing the Bottom
Cut a 1 x 8 inch strip of the solid green paper, ink it and adhere it to the bottom of the panel. Punch out the teal frame and “laughter” die-cuts and ink them. Layer the tags, making sure the “laughter” tag peeks out over the left edge. Use foam tape of pop dots to raise the calendar mat. Add another artisan tape/punched circle flower made the same as above and the last piece of the crystal flourish.

Lacing
Use any coordinating ribbon from your stash to lace the three panels together. I chose a thin black ribbon and laced the pieces in an “X” formation. You can lace yours any way you like!

Finishing
You will also need to punch two small holes at the top edge of the calendar to tie the ribbon for hanging. I used my Cropadile and it was super easy. You could even use a household drill if you don’t have any scrappy tools strong enough. Tie knots at the ends of the ribbon so that they are secure for hanging.
Finally, insert a photo (black and white looks great on this!) and the correct calendar card into their slots.
I also adhered an envelope to the back of the middle panel. I placed the rest of my calendar months in there for storage.

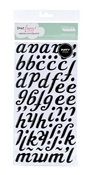
The following products were used to create this: