

How to Make Paper Easter Baskets!

Hello everyone! It’s Emily again and I have a fun, easy craft that you can do for this Easter holiday (or just for spring)! Hop along with me & let me show you how to make some PAPER Easter baskets! You heard that right, all you need is some 6×6 paper (although I will show you how to do this for 12×12 & 8×8 paper also)! Let’s get started!

For this project, I used some Easter paper I had in my stash from Echo Park, but you can find some adorable new Easter & Spring 6×6 paper pads by Echo Park if you need some. I also used their ephemera, some Easter stamps, cute adorable brads, and some sequins (because why not?). I’m going to show you how to do this for the 6×6 paper, it makes these adorable mini Easter baskets that could be used as little gifts for the kids, or even name holders at the dinner table (stuffed with chocolate, of course!).
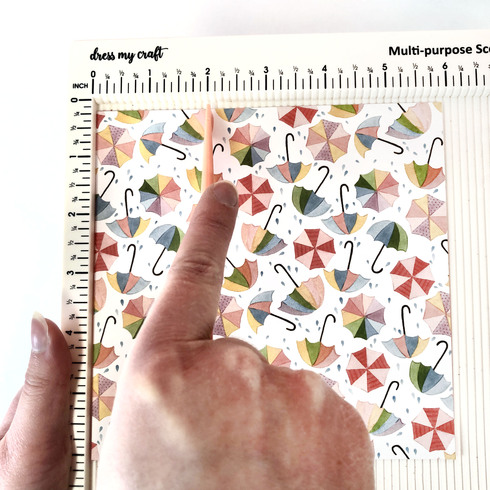
First, find the piece of paper you want to use and grab a score board. You will score your paper every two inches, (so at 2 inches, then 4 inches) and then turn it, and repeat on the other side, so you end up with 9 little squares. Fold each side in just so they are creased nicely and able to move.

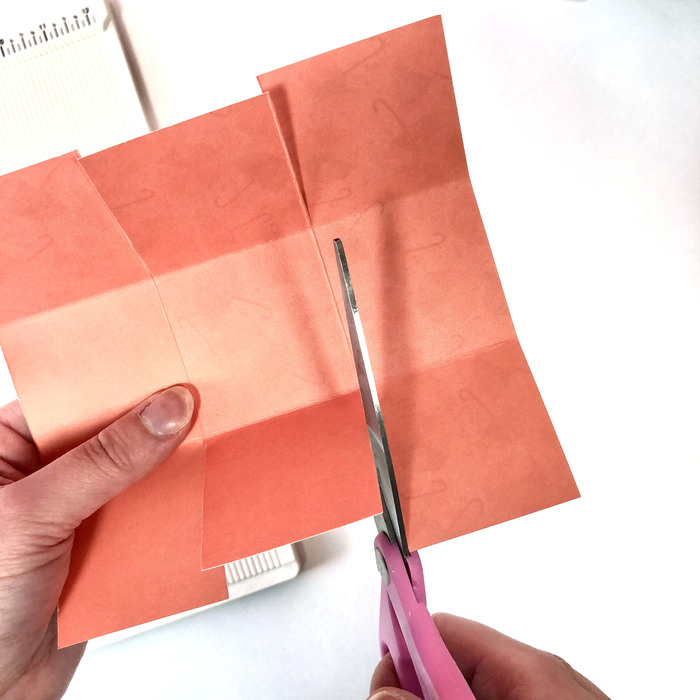
Next, you choose a side, and cut the crease until you hit the middle square, then stop. You do this on 2 sides of the paper (so the top & bottom – leave the sides as is).
From here, it will be simple to fold in the sides onto each other (it does it naturally) and it will make a little paper basket! This is where you grab some Cherry Tape, and adhere the sides & middle onto each other.


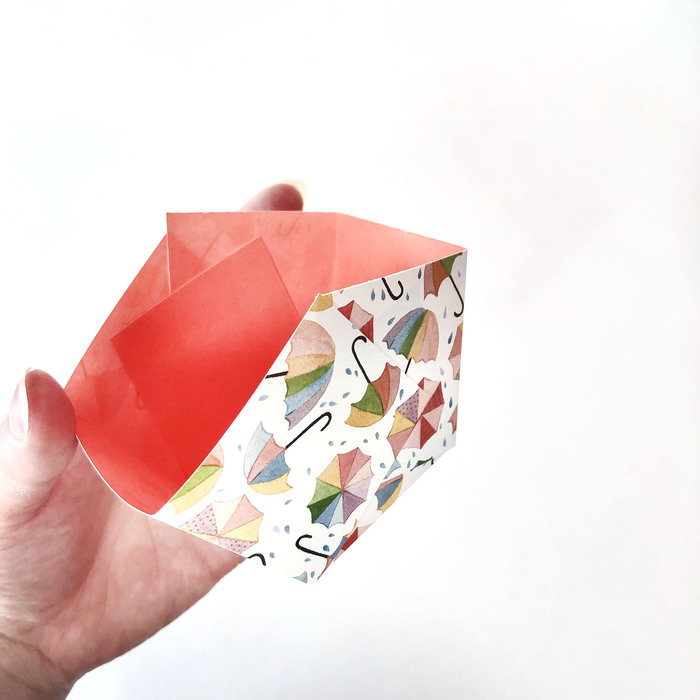
Look how cute that is! From here, we will make the handles. I used some 6×6 plain paper from DCWV and just chose a color that went with the paper. I kept it 6 inches long and just cut a thickness I thought worked for this size basket. I used the Crop-A-Dile Hole punch to make an 1/8 inch hole in the handles and the basket so I could add my brads.


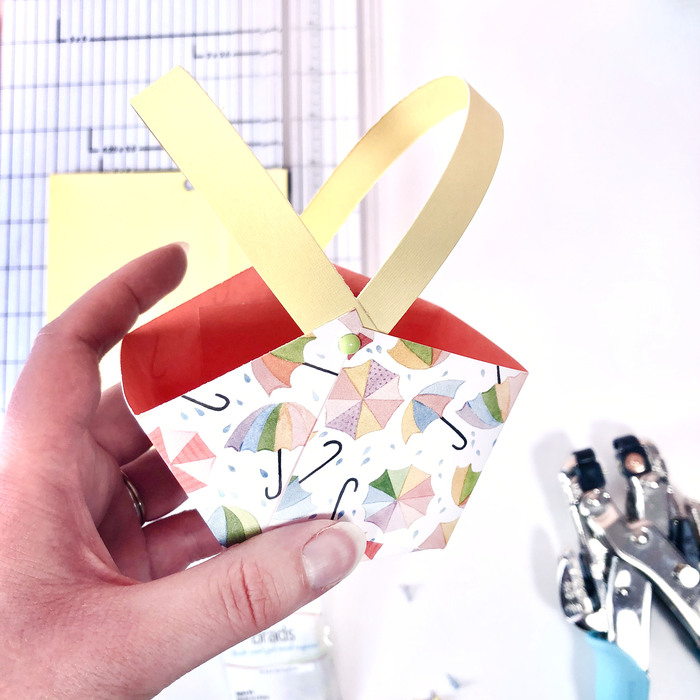
Now you have handles that can move back and forth! You don’t need the brads (you can just tape the handles on to make it easier), but I thought this was a fun touch. The next step is to make some fake grass for the inside of the basket! I grabbed some green paper I had on hand, and started cutting super thin strips. It’s better if you do them all different sizes, and even different colors of green to add some dimension!


From here, I just folded up the paper in bunches in a zig-zag sort of way to show the crumpled look of the grass you get in an Easter basket.

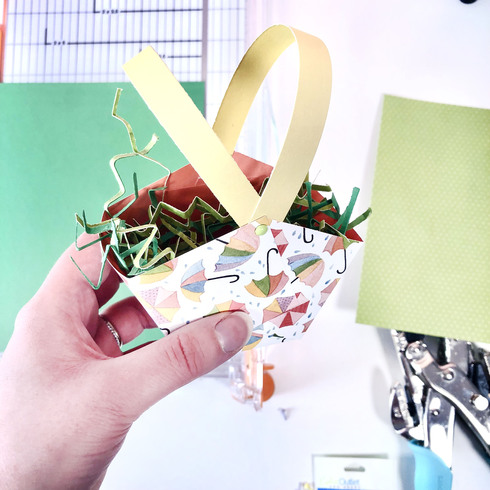
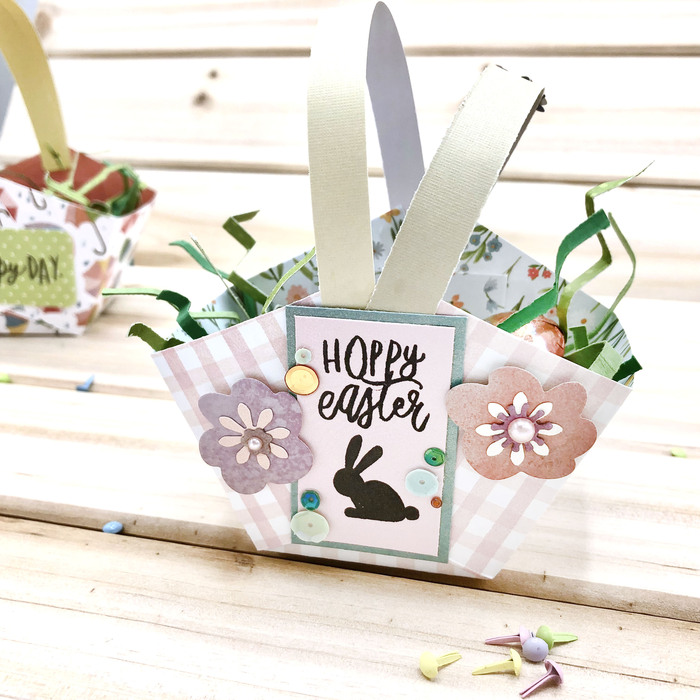
How cute is that! From here, you can add on the ephemera, or hand stamp some sayings like I did as well. Add your finishing touches, like sequins or stickers, I also added a butterfly and a flower onto the handles! Make it your own!
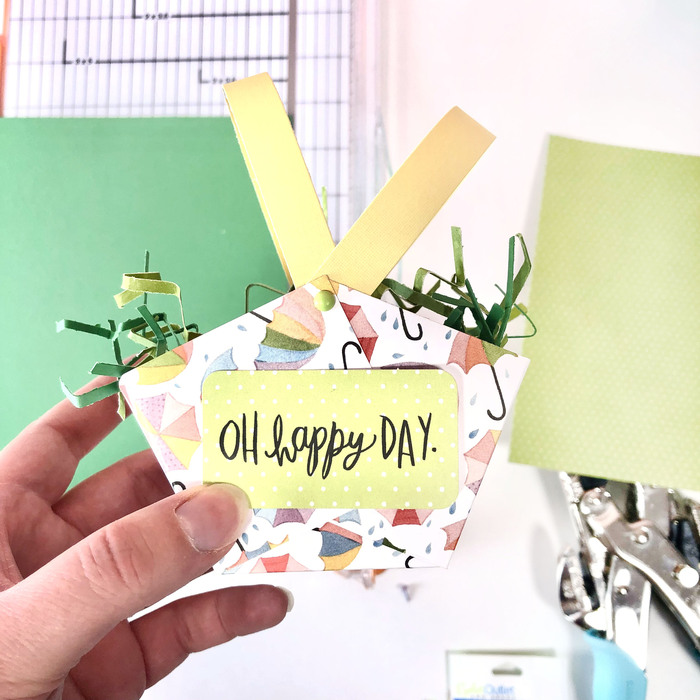


You can even do two separate handles like this one:

Here is the one with taped handles (still super cute!):
Didn’t these turn out adorable?! As promised, here are the sizes if you’d like to try this with 12×12 paper, or 8×8 paper.
- 12×12 paper: score at 4 inches, then 8 inches
- 8×8 paper: score at 2 & 2/3 inches, then 5 & 1/3 inches
- Reminder for 6×6: 2 inches, then 4 inches
The picture below shows the 12×12 at the top of the photo, 8×8 paper basket is to the right, and the 6×6 (the one shown in this blog) is on the left side.

I hope you get to try this for this Easter holiday! It’s a great craft that kids would also enjoy being involed in. Have a safe and happy holiday!


Here is a quick video showing how to make the 6×6 baskets, Enjoy!

Emily Moore
My name is Emily Moore & I love handmaking cards! I have an amazing, supportive husband, and a giant beautiful Bernese Mountain dog named George. I get very excited about pretty paper & love making detailed designs using die cuts, stencils, and any new techniques I can find! I used to work as a scrapbook teacher at Scrappy Chic in Livonia, but the pandemic allowed us to move up north more towards family (& A Cherry On Top!). I also recently made a career shift from finance to working at A Cherry On Top and absolutely love it. Come, stop by & say hi! You can find me in the storefront!
You can find more from Emily on her Etsy, Gallery, and Instagram!


I love how you made your own “grass”, and this puts those brads to good use!
These are so fun to make. I made one yesterday to hold my fancy eggs 🙂