Sea Shells Picture Frames
Hello Cherries!
Today, I'm excited to share these sea shells shaped picture frames. These are just too adorable to hold your beach vacation memories. I also have a few simple steps to follow if you wish to make one for yourself.

**Materials Needed:**
– Chipboard for the base
– Chipboard for the base
– Mintay Papers Coastal Memories Collection
– Chippies Set
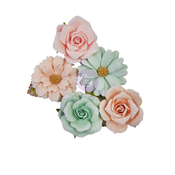
– Paper Flowers from Prima Marketing Inc.
– Chippies Set
– Paper Flowers from Prima Marketing Inc.

**Step 1: Prepare the Sea Shell Base**
Start by taking a piece of chipboard 1000 gsm approx and draw a sea shell template on the chipboard. Once you like the shape, fuzzy cut it out. Also, cut out a circle to add to the center for picture display.
Start by taking a piece of chipboard 1000 gsm approx and draw a sea shell template on the chipboard. Once you like the shape, fuzzy cut it out. Also, cut out a circle to add to the center for picture display.

**Step 2: Ready the base Frame **
Next, Take the choice of fabric to cover the shell base, in case you don't have fabric, you can also do the same with the chosen paper collection. Take a similar shell cutout for the backing to hold the picture in place. Finish by adding a triangular-shaped base to make it stand anywhere as a home decor display.
Next, Take the choice of fabric to cover the shell base, in case you don't have fabric, you can also do the same with the chosen paper collection. Take a similar shell cutout for the backing to hold the picture in place. Finish by adding a triangular-shaped base to make it stand anywhere as a home decor display.

**Step 4: Embellishing the Shell Frame **
I went ahead to complete the decor on the bottom of the shell with some floral arrangements and created layering with elements from the pack as well as some chippies from the brand. Finally, finish up with pearls and decor stones around.
And there you have it! I hope you enjoyed today's tutorial and leave some love in the comments below.
Happy crafting!
List of Supplies: