


Congratulations! Thanks to everyone who participated! I loved seeing everyone's unique take on the Starting Point.

Starting Point Challenge
This challenge is inspired by one of my very favorite scrapbookers, Shimelle Laine. If you haven’t visited her site or taken one of her classes, you are missing out! She is a great teacher and never fails to inspire!
One of Shimelle’s regular blog challenges is called a starting point. Instead of the typical sketch challenge, she creates a base layout and gives you the dimensions of the paper sizes to cut. It is up to you, where to place your photos, journaling, title, and embellishments. As the name implies, it is simply a starting point.
What I love about this challenge is that it gets me going on a layout. If you ever have that fear of the blank page, this is a good way to overcome it! It is also a great way to use up your scrap stash!
Below is my version of a starting point challenge for you:

I started with a blank 12x12 white cardstock. First, I cut a 9.5” x 10.5”piece of a large floral pattern paper and a 2.5”x10.5” striped pattern paper. I butted those up, edge to edge, rounded the 4 extreme corners and centered them on the white cardstock. Next, I cut a 2”x11” strip of small floral pattern paper and placed it on top of where the other two patterned papers meet. (Note: Only place adhesive down the middle of the strip, because you will be adding the last strip beneath this layer.) Lastly, I cut about a 1.5” X 11” small polka dot pattern and used my Fiskar’s edge punch. I lined it up and tucked it under the small floral pattern.
You can use whatever paper and supplies you have on hand. The challenge is to add your pictures, title, journaling, and embellishments in whatever fashion that appeals to you. Remember, this is just a “starting point”. You can turn the canvas anyway you like or however it will work for you. The only rule is to start with the same base layout. Also, I want to add that you shouldn’t feel like you have to round your edges or use the same decorative border punch I used. That is entirely up to you!
Here is my finished layout and a few words about my process:

My first step was to get my photos on the page. I matted them with a solid coordinating paper and rounded the left sides, bottom and top edges. Next, I did my title work. The title area just didn’t feel balanced to me, so I layered the top half of a long rectangular journaling card at the top, above the word “so”. I added the other half of the journaling strip to the bottom of the layout. Next, I added a couple of strips of washi tape down the center of the long strip on the right. I also added the 2nd embellishment area, in the middle of the page by tucking in a few tags and labels. At this point, I decided I needed some texture, so I stapled loopy twine down the right hand side. I knew I wanted to repeat the washi tape and twine to create a sense of balance, so I added it to the title and layered tag area. Now, I felt like the layout needed some dimension, so I fussy-cut some of the flowers from the patterned paper and found some small Prima butterflies in my stash. I pop- dotted them around my 3 central embellishment areas (1. Title at the top 2. Layered tags in the middle 3. Round tag area at the bottom right). Lastly, I added a few word stickers from Tim Holtz and my journaling. I stood back for a moment and decided to call this layout done.
Detail Shots:


I can't wait to see your layouts based on this starting point!
This challenge is open to Paper, Digi, and Hybrid scrappers. Upload them to the gallery and link it back to this thread by Monday, April 30th, by 11:59 PM EST. Winner will be selected, Wednesday, May 2nd and will receive a $5 GC to ACOT!
[font="][/font]








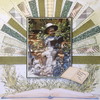



























 I worked on this for several days. Some of you seem to be able to create so easily. I envy you that talent. And this starting point said to start with a white background, but this LO just did not look good against a white background so I used a pp that was part of this Bo Bunny collection.